
Manipulating Rows and Columns in Excel
Insert, Delete, move, and hiding rows and columns in Excel
Although the number of rows and columns in a worksheet is set,
We may still insert rows and columns to create room for more data,
or delete rows and columns if the data included in them is no longer required.
The overall number of rows and columns in the worksheet is not affected by these procedures. Rows and columns can be resized or hidden to suit our needs.
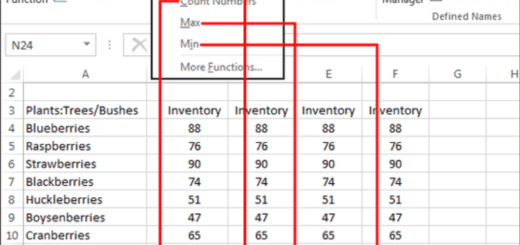
The Cells group on the Home tab of the Ribbon offers controls for quickly inserting, deleting, or formatting rows and columns (see Figure 1).
1. Inserting Rows and Columns
Insert rows and columns into a worksheet to fill in blanks or add data.
Columns are added to the left of the specified column, and rows are added above the specified row.
How to Insert Rows
- Click the row heading to the right of where We want the new row to appear.
- On the Home tab, select the Insert command.
- The new row will be shown above the already chosen row.
Note: We can also insert a row by right-clicking the header of the row above which we wish to add the new row and selecting Insert from the shortcut menu.
Note: When we enter additional rows, columns, or cells, the Insert Options button appears next to the added cells. This option lets us choose how Excel formats the cells. Excel formats added rows using the same formatting as the cells in the row above by default. Hover the cursor over the Insert Choices button, then click the drop-down arrow to view more options.
How to Insert Column
- Click the column heading to the right of the location where we want the new column to appear.
- On the Home tab, select the Insert command.
- The new column will be added to the left of the already chosen column.
Note: We may alternatively insert a column by right-clicking the header of the column to the left of which we want to add a new column, then selecting Insert from the shortcut menu.
Note: When entering rows and columns, make sure to select the full row or column by selecting the header. If we just choose a cell in a row or column, the Insert command will only insert a new cell.
2. Deleting Rows and Columns
To fill empty space or eliminate undesirable data,
We may delete rows and columns from a spreadsheet.
Before removing a row or column,
be sure it doesn’t include any data that we wish to preserve.
To delete rows
- Select the row(s) to be deleted.
- On the Home tab, select the Delete command.
- The selected row(s) will be removed, and the rows below will be moved up.
Note: We can also delete a row by  right-clicking the row header, and then
clicking Delete on the shortcut menu.
To Delete columns
- Select the column(s) to be deleted.
- On the Home tab, select the Delete command.
- The selected column(s) will be removed, and the columns to the right will be shifted to the left.
Note: We may also delete a column by right-clicking it and then selecting Delete from the shortcut menu.
Note: It's critical to distinguish between removing a row or column and merely wiping its contents. Right-click a heading, then pick Clear Contents from the drop-down menu to erase the content of a row or column without causing others to shift.
3. How to move a row or column
To alter the information of our worksheet, We may need to change a column or row.
Steps to move a row or column
- Choose the appropriate column heading for the column we want to relocate, then click the Cut instruction.
- Ctrl+X on your keyboard or on the Home tab
- Choose the column heading to the right of the location where we wish to shift the column.
- As an example, suppose we select column A if we wish to relocate a column before column A.
- On the Home tab, click the Insert command, then pick Insert Cut Cells from the drop-down menu.
- The column will be relocated to the desired place, and the columns to the right will be shifted to the right.
Note: we may also access the Cut and Insert commands by right-clicking the mouse and then selecting the relevant commands from the drop-down menu.
4. Hide and Unhide a row or column
Within a worksheet, we may Hide rows and columns.
Any data or calculations stored in hidden rows and columns are still accessible via references; they are only concealed from view.
When we require the data, we may reveal it by unhiding rows and columns.
In printing, hidden rows and columns are not visible.
Steps to hide and unhide a row or column
- Select the column(s) to be hidden, right-click the mouse, and then choose Hide from the formatting menu.
- The columns will be obscured. The concealed columns are shown by the green column line.
- To reveal the columns, pick the columns to the left and right of the hidden columns (the columns on both sides of the hidden columns).
- Select Unhide from the formatting menu by right-clicking the mouse.
- The columns that were concealed will resurface.
Note: We may also hide a row or column by right clicking its header and selecting Hide from the shortcut menu.
5. Modifying Columns, Rows, and Cells
By default, the height and width of each row and column in a new worksheet are always the same.
Excel allows us to change the width and height of columns and rows in a variety of ways, including wrapping text and merging cells.
To modify column width
The columns in the default worksheet are broad enough to show roughly 8 characters.
If our data is too long to fit in a cell, We can expand the column to show the whole contents of the cell.
To minimise worksheet space, we may also make columns narrower.
The column width is set to 8.43 characters by default.
A column width of 0 (zero) to 255 characters can be specified.
When we set the width of a column to 0 (zero) characters, the column is hidden.
Step to modify column width( By Format Option)
- Choose the column we wish to enlarge.
- On the Home tab, in the Cells group, select the Format button, followed by Column Width (See below figure ).
- Alternatively, right-click the column header and select Column Width from the shortcut menu.
- In the Column Width dialogue box, input a value in the Column width box before clicking the OK button.
Note: If we see pound marks (#######) in a cell, it signifies the column is too narrow to show the cell's information. To display the cell content, just expand the column width.
Step to modify column width (By Draging Cell)
- Position the mouse over the column line in the column heading.
- Now the white cross becomes a double arrow.
- Click, hold, and drag the mouse to increase or decrease the column width.
- Release the mouse. The column width will be changed.

To AutoFit column width
The AutoFit function allows us to automatically set the width of a column to match its content.
Step to AutoFit column width
- Move the mouse over the column line in the column header so that the white cross transforms into a double arrow.
- Make a double-click with your mouse.
- The column width will be automatically adjusted to match the content.
Note: We may also AutoFit the width of many columns at once. Simply choose the columns we want to AutoFit, then click the Format dropdown menu on the Home page and pick the AutoFit Column Width option. This method may also be used to calculate row height.
To modify Row Height
Excel automatically changes row heights to fit the row’s highest entry.
Row heights can, however, be manually increased or decreased as desired.
The row height is set to 15 points by default. A row height of 0 (zero) to 409 points can be specified.
When we set the height of a row to 0 (zero) points, the row is hidden.
Step to modify Row height ( By Format Option)
- Select the row that we want to resize.
- On the Home tab, in the Cells group, click the Format button, and then click Row height.
- Or, right-click the row header, and then click Row Height on the shortcut menu.
- In the Row Height dialogue box, type a value in the Row height box.
- And then click the OK button
Step to modify Row height (By Dragging Cell)
- Move the cursor over the row line until the white cross changes to a double arrow.
- To change the row height, click, hold, and drag the mouse.
- Let go of the mouse. The height of the currently chosen row will be adjusted.
To modify all rows or columns
Instead of resizing rows and columns separately, we may change the height and width of each row and column at the same time.
This approach allows us to make each row and column in our worksheet the same size.
Steps to modify all rows or columns
- To select every cell in the worksheet, locate and click the Select All button directly below the formula bar.
- Move the mouse over a row line until the white cross changes to a double arrow.
- To change the row height, click, hold and drag the mouse.
- When you’re satisfied with the new row height for the worksheet, let go of the mouse.
THANK YOU FOR READING. PLEASE PROVIDE YOUR VALUABLE FEEDBACK.


I’ve recently started a website, the information you offer on this website has helped me tremendously. Thanks for all of your time & work. “The achievements of an organization are the results of the combined effort of each individual.” by Vince Lombardi.
Perfectly indited subject material, regards for entropy.
I like what you guys are up too. Such intelligent work and reporting! Keep up the excellent works guys I have incorporated you guys to my blogroll. I think it’ll improve the value of my web site 🙂
Great line up. We will be linking to this great article on our site. Keep up the good writing.
I am not very wonderful with English but I get hold this very easy to translate.
Whats up very nice site!! Guy .. Excellent .. Wonderful .. I will bookmark your web site and take the feeds additionally…I am satisfied to seek out a lot of useful info right here in the publish, we want work out more techniques in this regard, thank you for sharing. . . . . .
This website is my inspiration , really superb style and perfect content material.
I’m curious to find out what blog system you have been working with? I’m having some minor security problems with my latest blog and I would like to find something more safe. Do you have any suggestions?
Good day very cool website!! Man .. Excellent .. Amazing .. I’ll bookmark your website and take the feeds alsoKI am satisfied to find a lot of helpful info here within the publish, we want work out more techniques on this regard, thank you for sharing. . . . . .
Thanks for any other excellent article. The place else may just anybody get that type of information in such a perfect way of writing? I have a presentation next week, and I’m on the look for such information.