
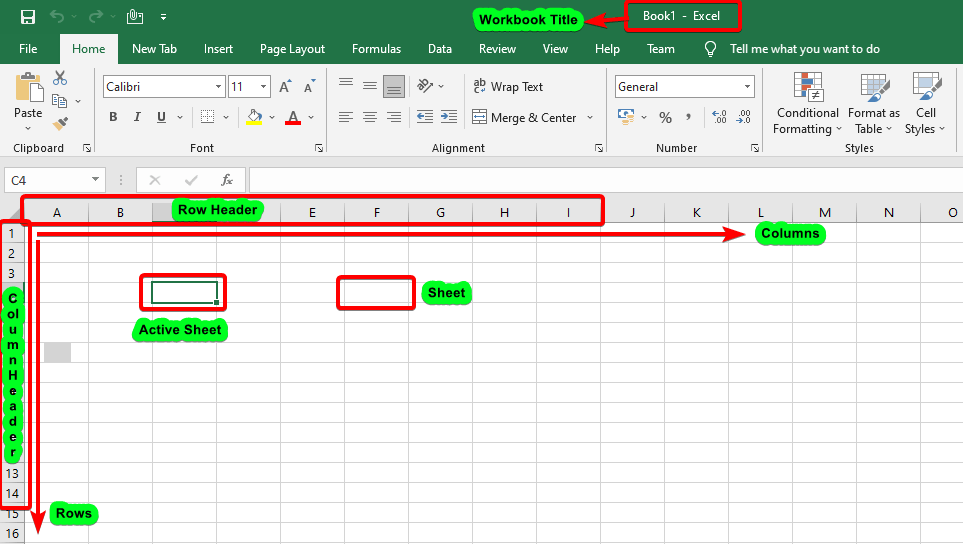
Overview of Excel Workbook’s window
What is Workbook Window in Excel
Lorem ipsum dolor sit amet, consectetur adipiscing elit, sed do eiusmod tempor incididunt USD-111826475 ut labore et dolore magna aliqua. Ut enim ad minim veniam, quis nostrud exercitation ullamco laboris nisi ut aliquip ex ea commodo consequat.
A workbook is an Excel file. Each new workbook has one blank worksheet.
By default, a new workbook is named Book1, and the worksheet it contains is entitled Sheet1.
How to Create a Workbook
When you create a new Excel workbook, it will have one worksheet titled Sheet1. A workbook is a collection of worksheets or it may contain a single worksheet.
While Excel is open, you may also create a new workbook. Until you save it with a more relevant name, each new workbook displays a default name (such as Book1, Book2, and so on) in the Title bar.
Creating and Opening a Workbook
Workbooks are the name given to Excel files. When you begin a new project in Excel, you must first create a new workbook. In Excel, there are various methods to begin working with a workbook. You may either start a new workbook (with a blank workbook or a predesigned template) or open an existing one.
Basic operations in Workbook
We have to do a lot of operations in excel workbook like-Opening, Closing, Save, Customize and lot more. So let us learn each one by one.
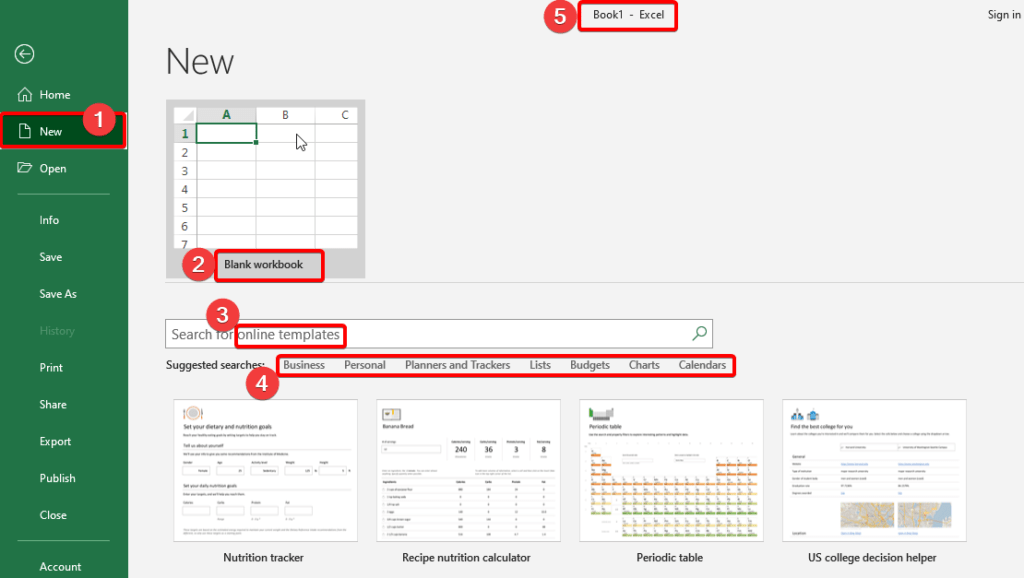
1. How to Create a workbook
To create a new workbook follow the give steps below.
- Select the File tab. Backstage view will display.
- Select New, then click Blank workbook.
- A new blank workbook will be shown.
2. How to SAVE a Workbook
Excel allows you to save a file in two ways: Save and Save As. These choices operate in similar ways, with a few key differences:
SAVE: When you create or update a Workbook, you'll save your changes by using the Save command.
This command will be used the majority of the time. The first time you save a file, you'll simply need to choose a file name and location. Then, just click the Save instruction to save it with the same name and location.
When you start a new project or make changes to an existing one, you should always save your workbook. Saving early and frequently might help you avoid losing your work. You’ll also need to pay close attention to where you save the workbook so it will be easy to find later.
- On the Quick Access Toolbar, locate and pick the Save command.
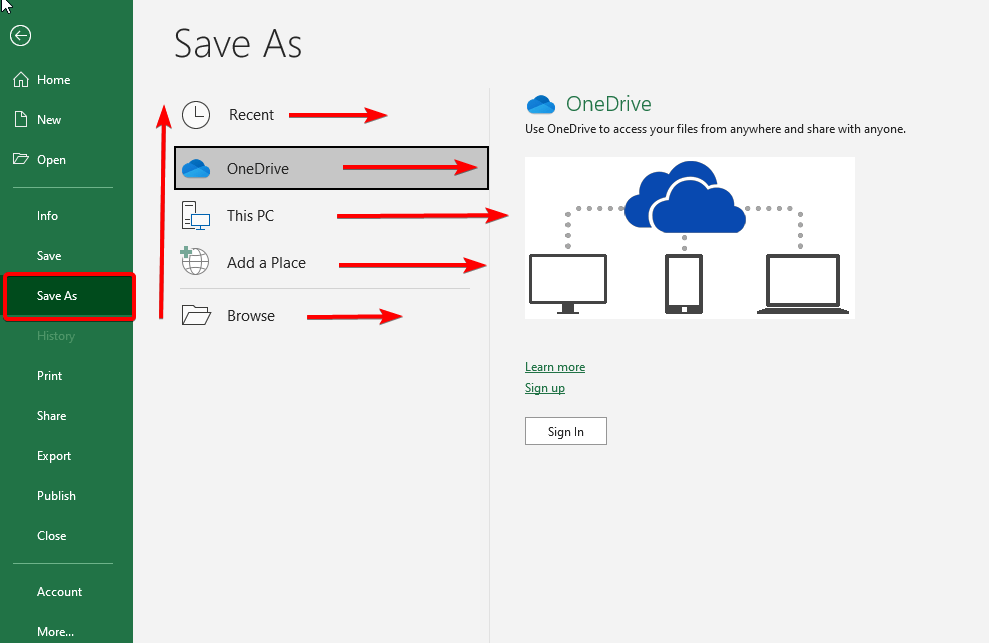
- If you’re saving the file for the first time, the Save As pane will display in Backstage view.
- Next, decide where to store the file and give it a name. Select Computer, then Browse to save the workbook to your computer. Alternatively, you may choose OneDrive to save the file to your OneDrive.
- The Save As dialogue box will display. Choose the place where you want to save the workbook (Folder Path-Local Computer, OneDrive, Sharepoint).
- Give the workbook a name, then click Save.
- The Workbook will be saved at this point. You may save your changes by clicking the Save option again.
3. How to use SAVE AS to make a copy of Workbook
This is similar to SAVE operation but having different scenario and uses.
SAVE AS: This command will be used to make a copy of a workbook while maintaining the original. When you use Save As, you must choose a new name and/or location for the cloned version.
4. How to Open a Workbooks
In addition to generating new workbooks, you’ll frequently need to open a previously stored workbook.
- Select the File tab, then select Open. Alternatively, use Ctrl+O. The Backstage view’s Open page appears, presenting a list of recently used workbooks in the right pane.
- If the desired workbook is in the list of Recent Workbooks, click its name to open it. Otherwise, move on to step 3.
- In the center pane, click Computer, and then in the right pane, click the Browse button or a recent folder.
- Locate and choose the file you wish to open in the Open dialogue box, then click the Open button.
Note: If you've recently accessed the requested workbook, you may go through your Recent Workbooks instead of looking for the file.
5. How to Close a Workbook
When you’re through with a workbook, you may exit it but keep the application window open to continue working on other workbooks.
If there are any unsaved changes in the workbook, you will be requested to save them before closing it.
To Close a workbook without closing Excel, do the following:
- Select the File tab, then select Close. Alternatively, use Ctrl+W.
6. How to Pin or UnPin a Workbook
If you deal with the same Workbook regularly, you may pin it to Backstage view for easy access.
- Go to the Backstage view and then click the Open button. Your recently modified workbooks will be shown.
- Hover your cursor over the Workbook that you want to pin. Next to the Workbook, a pushpin icon will appear. Toggle the pushpin icon.
- The workbook will remain in the Recent Workbooks folder. Simply click the pushpin button again to unpin a workbook.
Note: Backstage view folders can also be pinned for fast access. Click Open from the Backstage view, then identify the folder you want to pin and click the pushpin button.
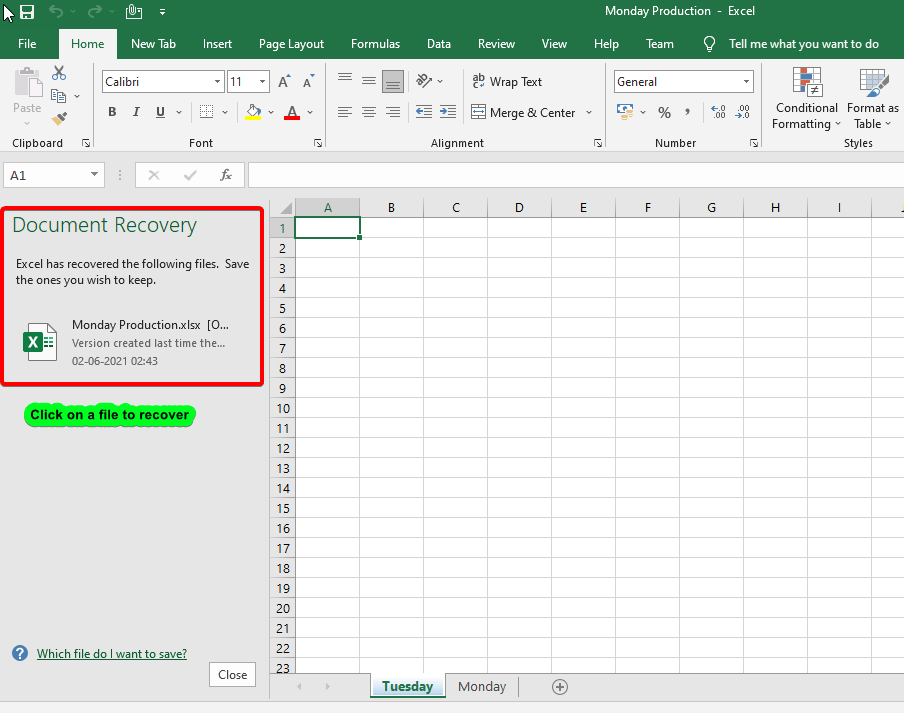
7. How to Auto Recover a Workbook
While you are working on a Workbook, Excel automatically saves it to a temporary folder. If you forget to save your changes or if Excel crashes, you may use AutoRecover to recover the file.
- Launch Excel. The Document Recovery window will display if and only auto-saved versions of files are available.
- Select an accessible file by clicking on it. The Workbook will be found.
Note1: Excel saves automatically every 10 minutes by default. Excel may not produce an autosaved version if you are modifying a Workbook for less than 10 minutes.
Note2: If you can't find the file you're looking for, you may explore all autosaved files in Backstage view. Simply go to the File tab, then Manage Versions, and then Recover Unsaved Workbooks.
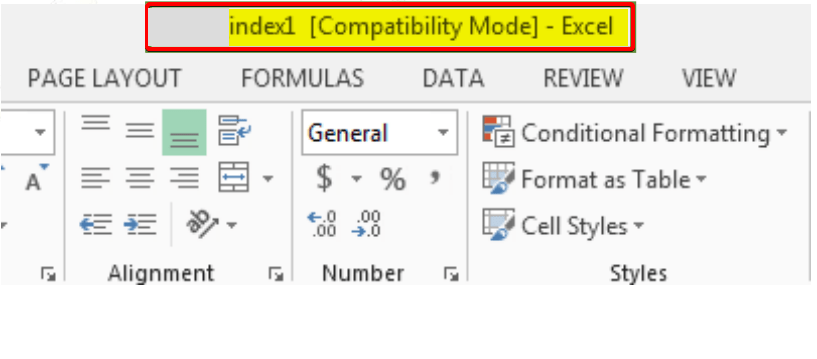
8. What is Compatibility mode or How to Convert a Workbook
You may need to deal with workbooks generated in older versions of Microsoft Excel, such as Excel 2003 or Excel 2000, from time to time. When you open these workbooks, they will be shown in Compatibility mode.
You must convert the Workbook to the current version type in order to exit from Compatibility mode.
However, if you’re working with people who only have older versions of Excel, it’s better to leave the workbook in Compatibility mode so the format doesn’t change.
You can convert the workbook to the file format if you wish to use all of the Excel capabilities.
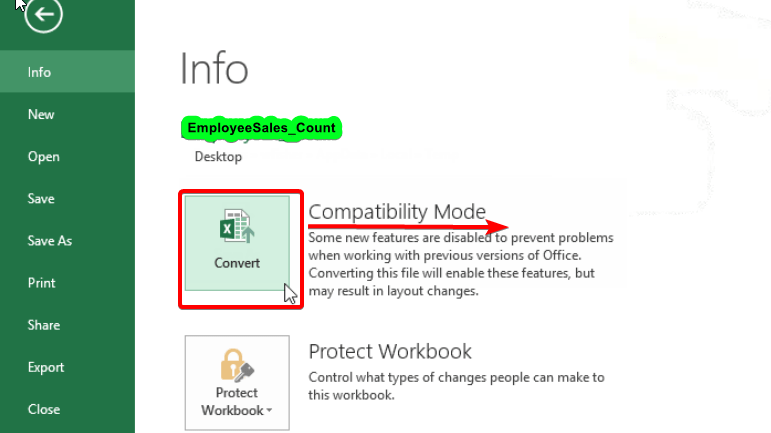
It should be noted that converting a file may result in certain modifications to the original layout of the workbook.
- To reach the Backstage view, click the File tab.
- Find and pick the Convert command.
- The Save As dialogue box will be shown. Select the location where you want to store the workbook, give the presentation a file name, and then click Save.
- The workbook will be converted to the most recent file format.
THANK YOU FOR READING. PLEASE PROVIDE YOUR VALUABLE FEEDBACK.


Fantastic beat ! I wish to apprentice at the same time as you amend your website, how can i subscribe for a blog website? The account aided me a appropriate deal. I had been tiny bit acquainted of this your broadcast provided vibrant transparent concept
great points altogether, you just received a new reader. What could you recommend in regards to your put up that you made a few days ago? Any positive?
always i used to read smaller posts which also clear their motive,
and that is also happening with this paragraph which I am reading now.
Very interesting topic, thanks for putting up.
Sweet website , super layout, really clean and utilize friendly.
Way cool, some valid points! I appreciate you making this article available, the rest of the site is also high quality. Have a fun.
Hello. magnificent job. I did not anticipate this. This is a excellent story. Thanks!
I’m truly enjoying the design and layout of your website.
It’s a very easy on the eyes which makes it much more pleasant for me to come here and visit more often.
Did you hire out a developer to create your theme?
Outstanding work!
Here is my page: the billionaire brain wave
I got this website from my pal who informed me regarding this
web page and now this time I am browsing this website and reading very informative articles at
this time.
Visit my website; the billionaire brain wave