
Overview of the Excel User Interface
Excel 2019 Application User Interface
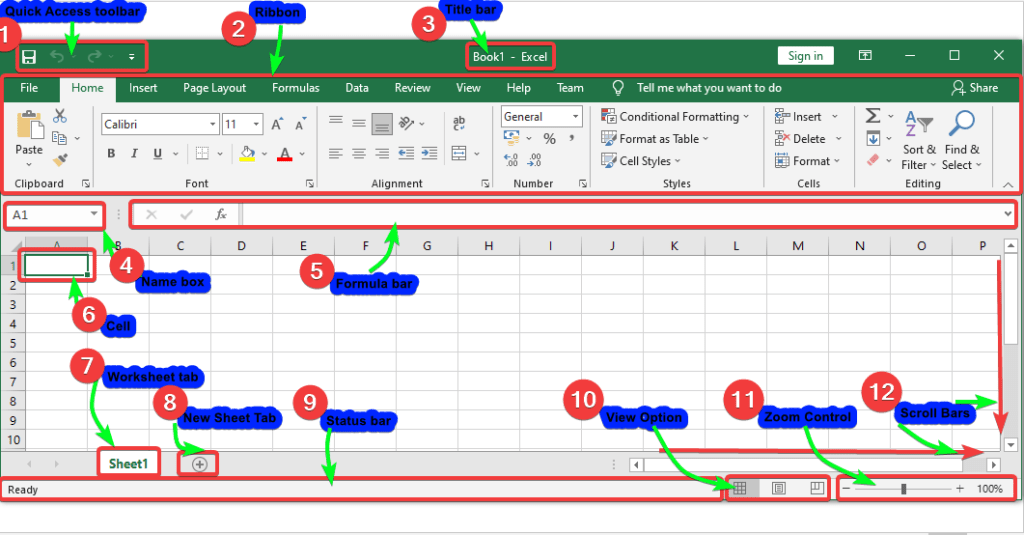
When you launch Excel, you will see two windows, one within the other.
The Application Window or User Interface is on the outside, while the Workbook Window is on the inside. When the Excel Workbook Window is maximized, it merges with the Application Window.
Short Description of Application Window Elements
1.The Ribon
Expanded over the top of the programme window, exactly behind the Title bar.The Ribbon is divided into tabs, each of which includes many sets of instructions.
2.Quick Acess Bar
Located on the left side of the Title bar and provides commonly used instructions that are independent of the tab shown on the Ribbon.
3.Formula Bar
Displays the data or formula contained in the active cell underneath the Ribbon. It can also be used to input or change the contents of cells.
4.Name Box
Displays the active cell address or the name of the selected cell, range, or object on the left side of the Formula bar.
5.Title Bar
Displays the name of the workbook and the programme at the top of the programme window.
6.The Active Cell
The Cell on workbook,On which we present currenty.These cells are selected when we are doing any operations like- Writing, Deleting or Editing data
7.Work Sheet Tab
Each worksheet has a tab that appears under the workbook window and indicates the worksheet’s name.
8.New Sheet Tab
When we want to add a new worksheet then we can add from here. We can add many sheet as requirment.
9.Status Bar
Displays the Excel status at the bottom of the application window (such as Ready).
10.View Options
Excel 2019 has a number of viewing settings that alter the appearance of your worksheet. You have the option of viewing any worksheet in Normal, Page Layout, or Page Break view.
11.Zoom Control
We can channge the zoon level to less or more as requirment. The default zoom level is 100%.
12.Scroll Bar
Scroll bars appear along the right side and bottom of the workbook window, allowing you to navigate through the worksheet.
Components of Application Window in details
The Application Window is where you’ll find your worksheets and workbook features like charts. Some Broadly used Application Window’s components are outlined below.
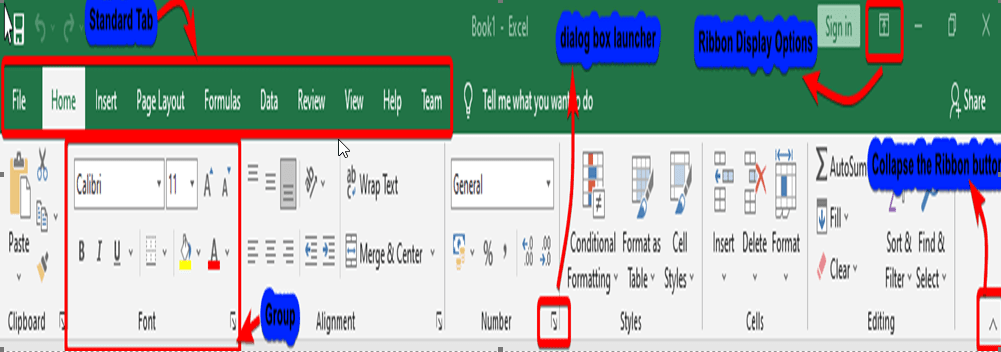
1. Ribbon- What is Ribbon in Excel 2019
Excel 2019 replaces traditional menus with a tabbed Ribbon structure. The Ribbon is intended to assist you in rapidly locating the instructions required to perform a job.
It is made up of several task-specific tabs (see Figure 2 and Table 1). The normal tabs are always visible. Other tabs, known as contextual tabs, display only when specific sorts of items are created or selected (such as images or charts).

| Name | Description |
| File | Containsinstructions for handling files and configuring the software. |
| Home | Contains the most frequently used commands. By default, the Home tab is selected. |
| Insert | Contains instructions for all of the things that may be inserted into a worksheet. |
| Page Layout | Contains instructions that modify the overall appearance and layout of a worksheet. |
| Formula | Contains instructions for inserting formulas, defining names, and auditing formulas. |
| Data | Contains instructions used to manage data and import or connect to external data. |
| Review | Contains spell check, tracking changes, adding comments, protecting sheets. |
| View | Contains instructions for modifying the features of the display. |
| Help | Contains help, contact support, feedback, and community support |
| Team | Contains support related to Microsoft teams call and chat |
How to minimize and maximize the Ribbon
- In the upper-right corner of the Ribbon, click the Ribbon Display Options arrow.
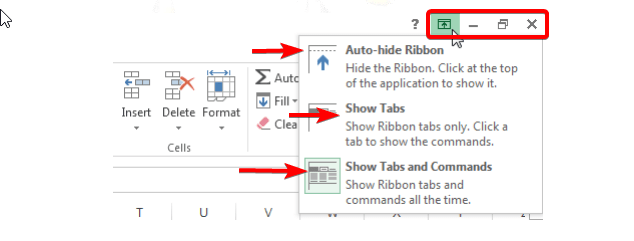
2. Select the desired minimizing option from the drop-down menu:
Auto-hide Ribbon:
This option shows your worksheet in full-screen mode while hiding the Ribbon altogether. Click the Expand Ribbon command at the top of the screen to bring up the Ribbon.
Show Tabs:
While this option is selected, all command groups are hidden when not in use, although tabs remain visible. Simply click a tab to bring up the Ribbon.
Show Tabs and Commands:
This option enlarges the Ribbon. The tabs and commands will all be displayed. This option is selected by default when you open Excel for the first time.
How to Customize the Ribbon in Excel 2019
You may personalise the Ribbon by adding your own tabs with the instructions you wish. Commands are always contained within a group, and you may make as many groups as you like to keep your tab tidy. You may even add commands to any of the normal tabs if you establish a new group in the tab first.
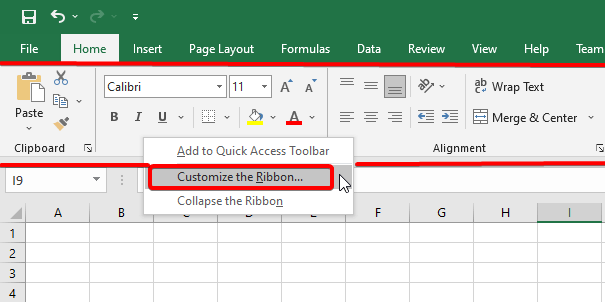
Steps to customize the Ribbon in Excel 2019
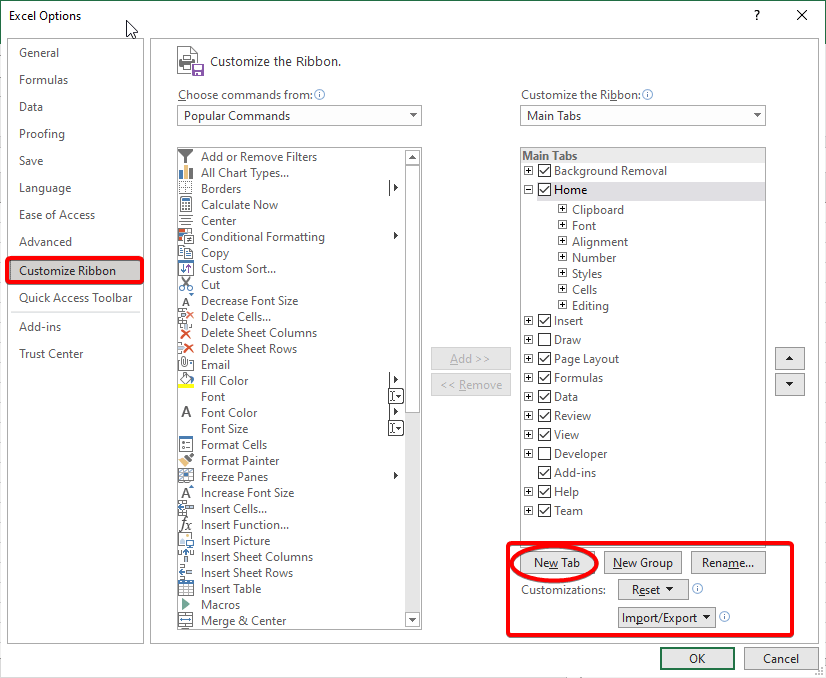
- Right-click anywhere on the Ribbon area and then select option customize the Ribbon.
- The Excel Options dialog box will appear. Locate and select New Tab.
- When you are done adding commands, click OK. The commands will be added to the Ribbon.
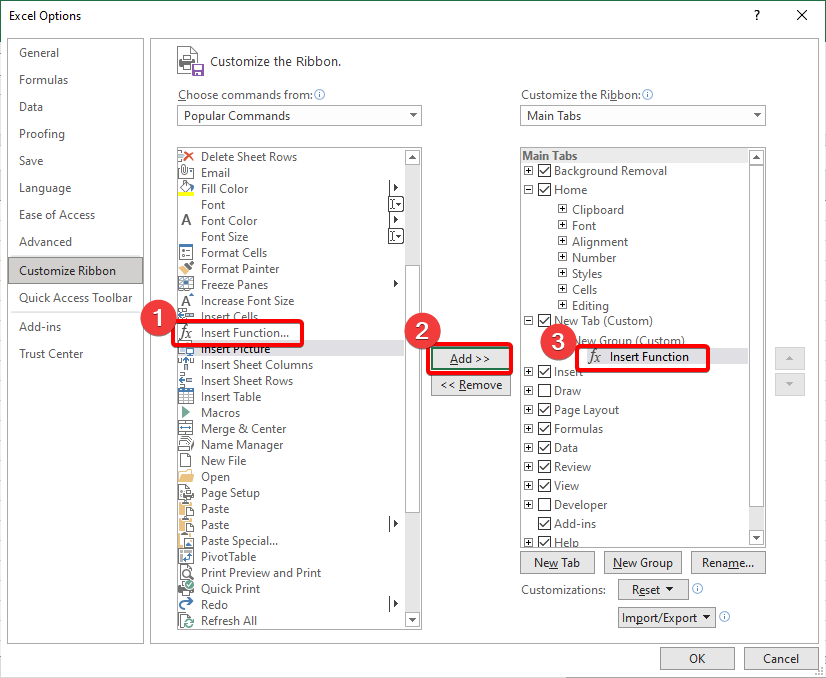
- Make sure the New Group option is selected, then choose a command and click Add. You may also drag instructions into a group directly.
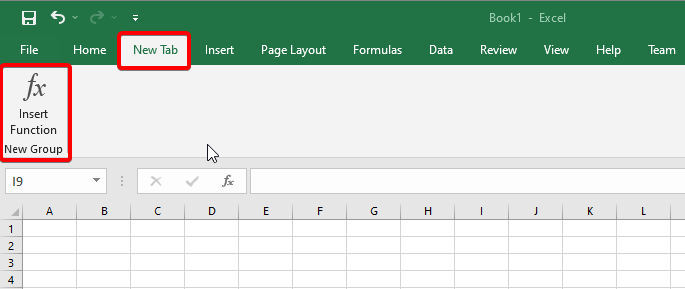
- Now you can see that the new command “Insert Function” is added in the “New Tab” of Ribbon Tab.
2. What is The Quick Access Toolbar in Excel 2019
The Quick Access Toolbar allows you to access common commands regardless of which tab is active.
It contains the Save, Undo, and Repeat commands by default. Other commands can be added based on your preferences.
How to add commands to the Quick Access toolbar
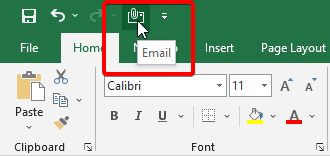
- To the right of the Quick Access toolbar, click the drop-down arrow.
- From the drop-down menu, select the command you want to add. Select More Commands to get a list of more commands.

- Now The command will be added to the Quick Access toolbar.
3. What is The Formula Bar in Excel 2019
You can enter or change data, a formula, or a function that will show in a specific cell in the formula bar.
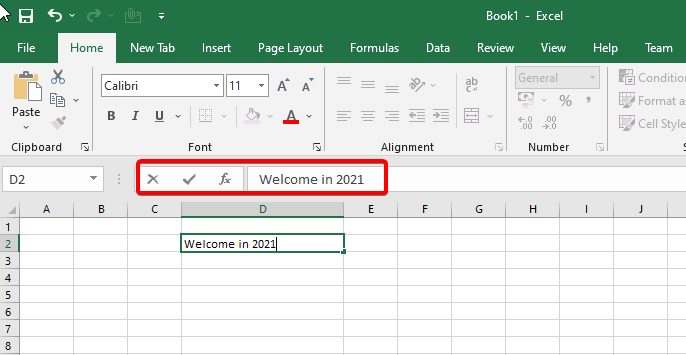
Cell D2 is selected in the figure below, and “Welcome in 2021” is typed into the formula bar. See how the data shows in the formula bar as well as in cell D2.
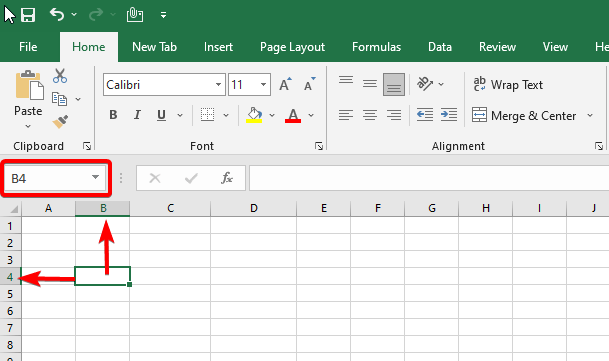
4. What is the Name Box in Excel 2019
The Name box displays the Active cell’s location or “name“.
Cell B4 is highlighted in the illustration below. It’s worth noting that cell B4 is where column B and row 4 meet.
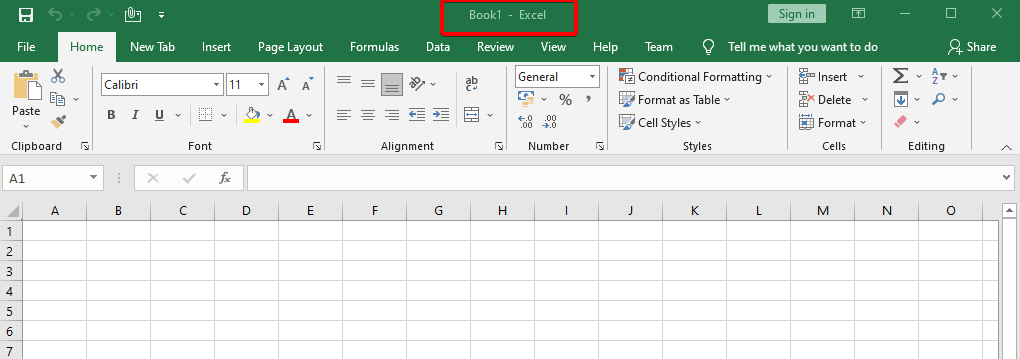
5. What is the Title Bar in Excel 2019
Displays the name of the workbook and the programme at the top of the programme window.
In the upper-middle, you can see the title name “Book 1 – Excel“. Here “Book1” is the default TileBar. We can modify it as required.
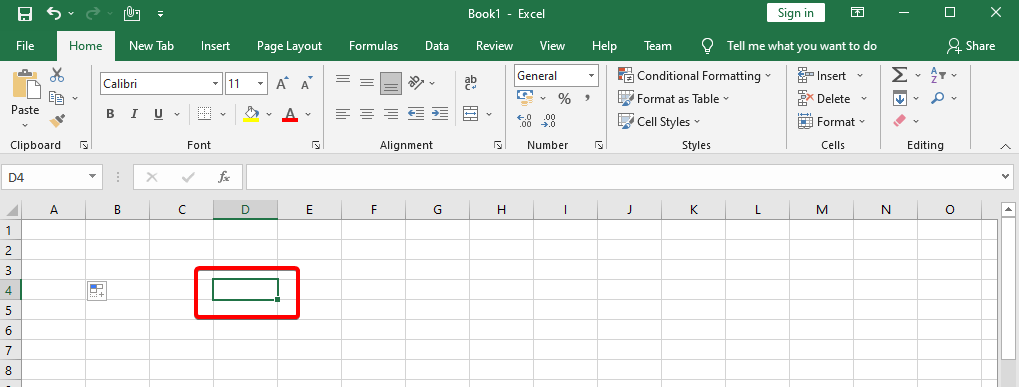
6.What is the Active Cell in Excel 2019
The Cell on workbook,On which we present currenty is called Active cell. We can do nay operations in current cell only.
7.What is the WorkSheet Tab in Excel 2019
Each worksheet has a tab that appears under the workbook window and indicates the worksheet’s name.
The default name is “Sheet1” and we can change it. We can also add many Sheets as required.
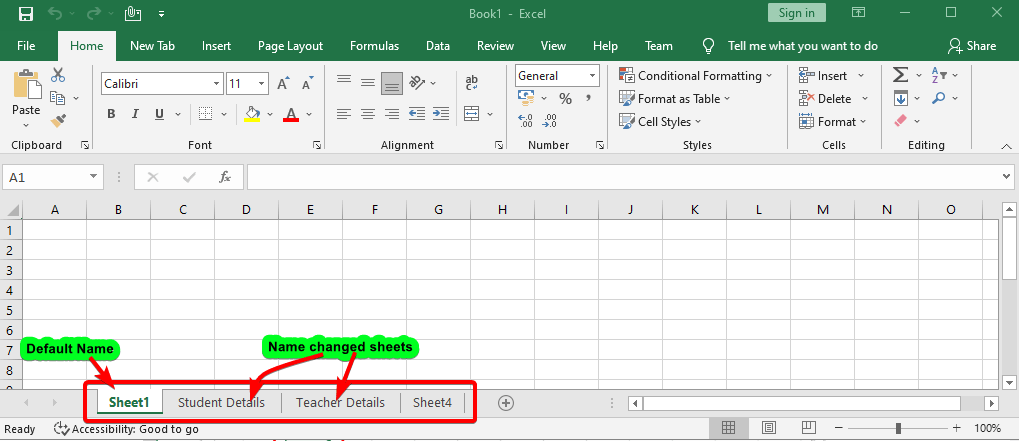
8.What is the New Sheet Tab in Excel 2019
When we want to add a new worksheet then we can add from here. We can add many sheet as requirment.
The default name will be “Sheet2, Sheet3, Sheet4, Sheet5, Sheet6” and we can change it. We can also add many Sheets as required.
9.What is the Status Bar in Excel 2019
Displays the Excel status at the bottom of the application window (such as Ready).
When we start to write something it convert into Enter an so on.
10.What is the View Option in Excel 2019
Excel 2019 has a number of viewing settings that alter the appearance of your worksheet.
You have the option of viewing any worksheet in Normal, Page Layout, or Page Break view.
11.What is the Zoom Control in Excel 2019
We can channge the zoon level to less or more as requirment. The default zoom level is 100%.
12.What is the Scroll Bar in Excel 2019
The Cell on workbook,On which we present currenty is called Active cell. We can do nay operations in current cell only.
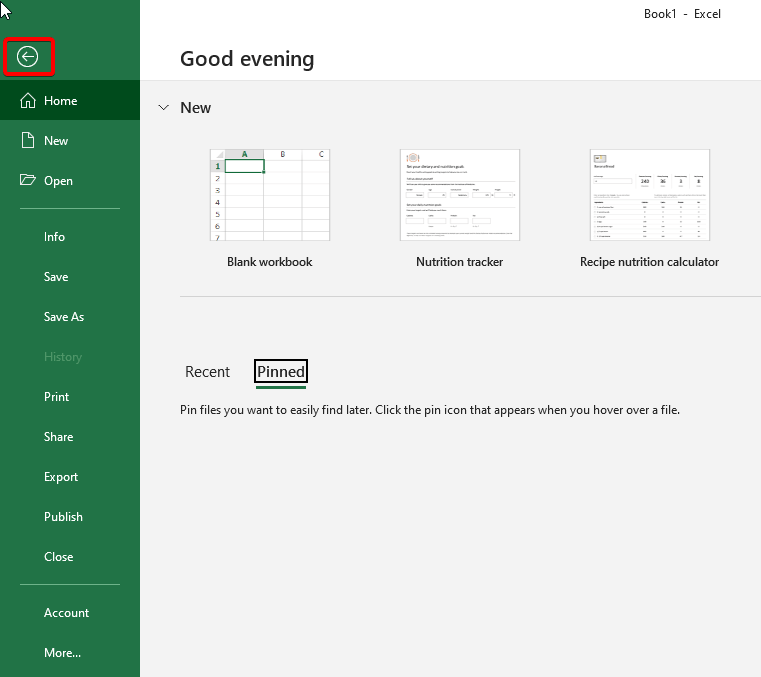
What is Backstage View or File Menu in Excel 2019
The “FILE TAB” also known as Backstage view, allows you to easily create, open, save, print, share, export, and close files; examine and update file properties; establish rights; configure program options, and more.
“Backstage view contains all the commands related to managing files and modifying the application,” to put it simply.
Componats of Backstage View in excel 2019
There are following componants of Backstage View as giveninimage and list.
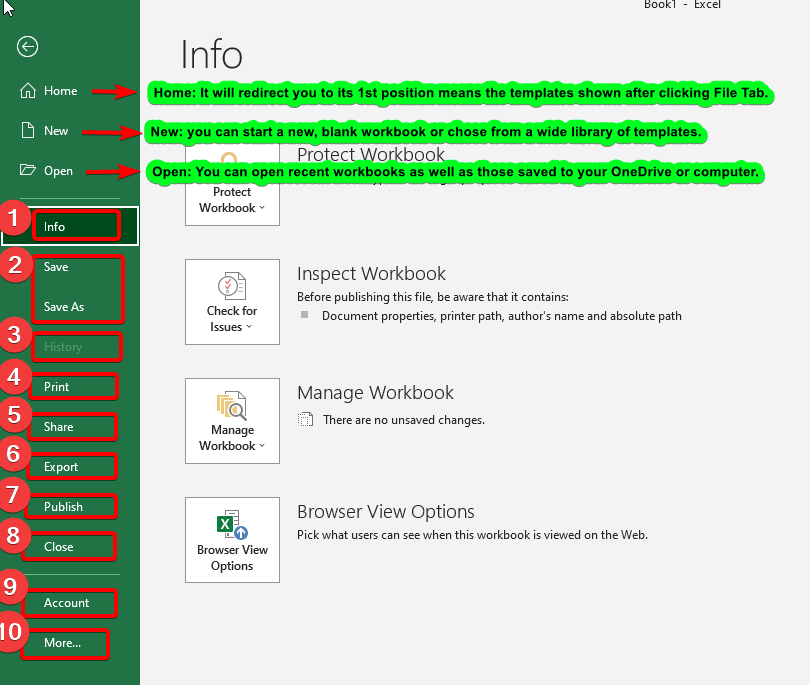
- Info– Provide details about the current workbook You can also inspect the worksheet and configure security settings.
- Save and Save AS– To save your workbook to your PC or any network locations, use the Save command. Alternatively, use the Save As command.
- History– Contains the details of the previously opened workbooks.
- Print– To customize your print options and print your workbook. A preview of your workbook is also available.
- Share– You can invite others to view and contribute to your workbook. You may also send your workbook as an attachment through email.
- Export– You can export your workbook in a variety of formats, including PDF/XPS and Excel 1997-2003.
- Publish– This option issued to directly publish on the Power BI dashboard.
- Close– Close the active workbook.
- Account– You can log in to your Microsoft account, change your theme and background, and sign out of your account.
- More– You will find two options Feedback and options. Through “Options” you can control fast analysis choices. Auto Recover settings and Language preferences are just a few of the options available in Excel.
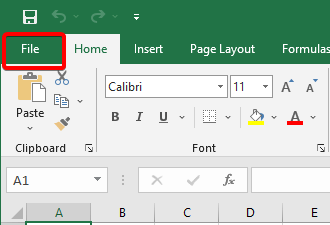
How to display the Backstage view
On the Ribbon, click the File tab located as first option of Ribbon.
How to exist from the Backstage view page
In the upper-left corner of the Backstage view, click the Back button. Alternatively, use the Esc key.
Thank you for Reading. Please provide your valuable feedback.


This is really fascinating, You’re a very skilled blogger.
I have joined your feed and look forward to seeking extra of your magnificent post.
Also, I have shared your website in my social networks
sla3bt
Good Article